Let’s encrypt introduced Internationalized Domain Names Support on 21st, so naturally I wanted to test the certificates on a few sites of one of my Swedish clients.
What seems like a perfectly simple idea of course turned in to a disaster, so I’ll talk about all the problems I came across, and how I finally made the whole thing work.
First rule of setting Https(Don’t talk about Https?No?) – Make sure your iptables rules don’t block the traffic on port 443. It took me sometime to realize that, although it seems trivial.
The solution to this problem is pretty simple:
sudo iptables -A INPUT -p tcp --dport 443 -m conntrack --ctstate NEW,ESTABLISHED -j ACCEPT
sudo iptables -A OUTPUT -p tcp --sport 443 -m conntrack --ctstate ESTABLISHED -j ACCEPT
Now lets talk infrastructure! I wanted to add this solution on a working server with a lot of live sites, without disturbing the ecosystem too much, so I looked for relatively easy non-invasive ways of doing that. Now, since Varnish has stated (on multiple occasions), that they won’t be doing HTTPS support any time soon I looked for an alternative.
I was currently using Varnish to handle traffic on port 80, which redirected the traffic to Apache2 on port 8080. I did not want to make the infrastructure more complicated then it currently was but I had no choice, so I decided to install Nginx for handling the HTTPS traffic.
Now how would that monstrosity look?
If a user attemps to access the HTTPS protocol version of a website, the Nginx forwards the request to Varnish, which either replies with a cached content or requests the content from Apache and caches it. To turn it into digits 443 => 80 => 8080 => 80 => 443. Get it? Got it? Good.
Now lets install Nginx, get the dev version of certbot, register one https certiciate at Let’s encrypt and setup one vhost.
- Installing Nginx on Ubuntu/Debian is as simple as:
sudo apt-get update && sudo apt-get install nginx - Obtaining the development version of certbot(At the time of the writing the normal version does not support IDN domains):
git clone https://github.com/certbot/certbot cd certbot ./letsencrypt-auto-source/letsencrypt-auto --os-packages-only ./tools/venv.sh source ./venv/bin/activate - Requesting HTTPS certificate from Let’s encrypt. For the purpose ox the article I’ll use the example domain “http://xn--exmple-cua.se/” otherwise said “exämple.se”. The command you need to run to obtain the certificate for this specific domain is:
certbot --certonly -d xn--exmple-cua.seThen follow the instructions to verify the domain and after the successful verification you’ll get the path to the full certificate chain. Something similar to:
/etc/letsencrypt/live/xn--exmple-cua.se/fullchain.pem - Now lets setup the Nginx vhost, so that it can utilise the certificate we just got. For my particular case, I decided to remove the default vhost altogether and create my own.
rm /etc/nginx/sites-available/default nano /etc/nginx/sites-available/xn--exmple-cua.seAnd in the vhost you put:server { listen 443 ssl; server_name xn--exmple-cua.se; ssl_certificate /etc/letsencrypt/live/xn--exmple-cua.se/fullchain.pem; ssl_certificate_key /etc/letsencrypt/live/xn--exmple-cua.se/privkey.pem; location / { proxy_pass http://127.0.0.1:80; proxy_set_header X-Real-IP $remote_addr; proxy_set_header X-Forwarded-For $proxy_add_x_forwarded_for; proxy_set_header X-Forwarded-Proto https; proxy_set_header X-Forwarded-Port 443; proxy_set_header Host $host; } }Substituting server_name with your domain name and ssl_certificate and ssl_certificate_key with the ones you received in the previous step.
- Now, if you reboot your nginx server (service nginx restart) you should be able to visit your url https://xn--exmple-cua.se and it should open
Now you’ve accomplished what you want…partly, unfortunately not yet good enough. You have to redirect all traffic from http:// to https:// and make WordPress(WPMU in this example) serve the CSS, JS and images with the proper protocol.
I’ve decided to redirect the traffic using Varnish(I just failed in any other imaginable way for some reason…), and here is how I accomplished it.
In my “sub vcl_recv” block I’ve added:
if ((client.ip != "127.0.0.1" && std.port(server.ip) == 80) &&
(req.http.host ~ "^(?i)(www\.)?xn--exmple-cua.se")) {
    set req.http.x-redir = "https://" + req.http.host + req.url;
    return (synth(750, ""));
}
I’ve also added “sub vcl_synth” block with the following content:
sub vcl_synth {
    # Listen to 750 status from vcl_recv.
    if (resp.status == 750) {
    // Redirect to HTTPS with 301 status.
        set resp.status = 301;
        set resp.http.Location = req.http.x-redir;
        return(deliver);
    }
}
Now after you restart varnish (service varnish restart), your site should automatically direct to the HTTPS version.
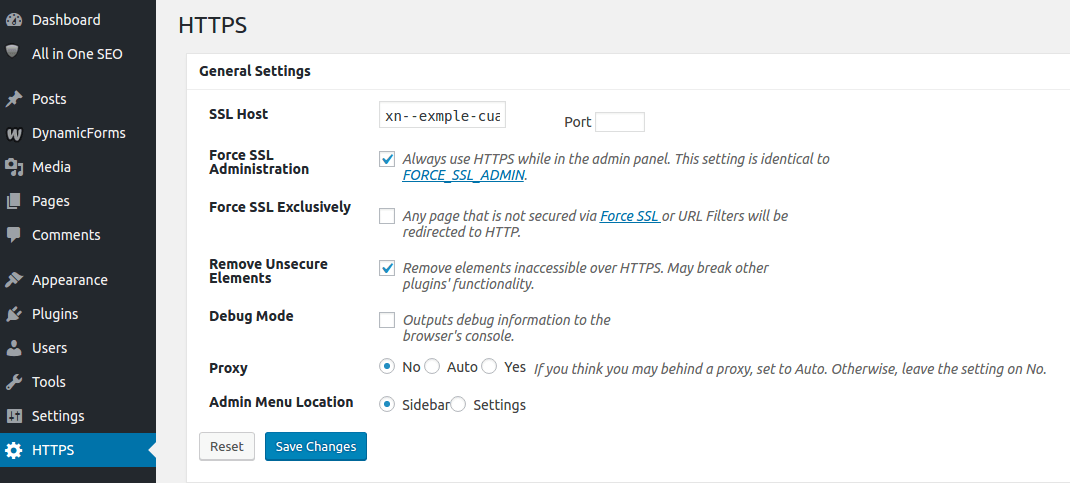
In order to make WordPress serve the resources from the proper protocol I installed the plugin WordPress HTTPS, Network Activated it, and in the site I am working on and used the following settings:
Leave a Reply